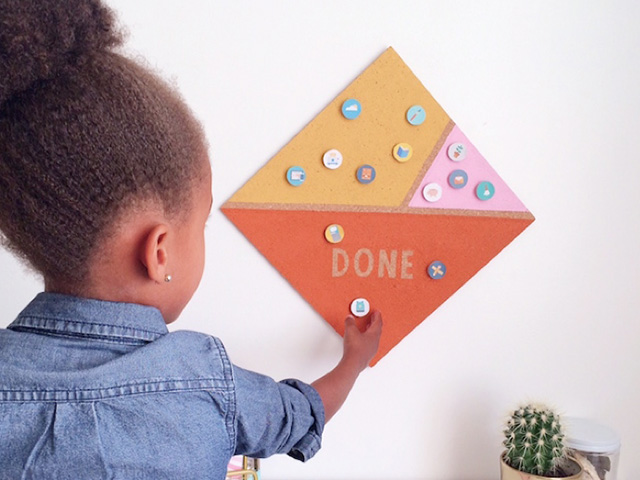
Keep ‘Em On Task With This DIY Cork Board Chore Chart

School is officially in session for my kiddos, and I’m determined to nag my first grader about chores and responsibilities less this year. Instead of constantly reminding her to do this, that, and the other, I’m hoping this DIY cork board chore chart that I designed will make it easier for her to take charge of her to-dos. The large section of the top of the board is filled with icons to represent her daily tasks. Once each is complete, she’ll move the tile to the “done” section of the board, making it easy for her to see at-a-glance what she still needs to accomplish each day.

Tiles include images to remind her to make her bed, pack her backpack, read, do homework, and go outside and play every day. Yes, even in winter. I’d much rather her play in the sub-zero Minnesota snows than sit around on the iPad. The smaller triangle at the top of the chore chart is for tasks she needs to accomplish less frequently. Vacuuming her room (with a kid-sized vacuum), cleaning the bathroom, and watering the plants only need to be done on the weekends. I downloaded these awesome icons from DesignBlog, and you can find even more free icons on Pinterest, in case you need some for your kid that I’ve overlooked.

Supplies:

  • printable chore chart icon template with icons by DesignBlog
  • 3 colors of acrylic paint
  • 12″ x 12″ cork tile
  • 1″ wooden circles
  • 1″ circle craft punch
  • narrow washi tape
  • foam craft paintbrush
  • alphabet stickers in the font of your choice (optional)
  • thumbtacks
  • school glue or glue stick
  • hot glue sticks and glue gun

Instructions:

Step 1: Print our chore chart icon template, and cut out each 1″ icon with a 1″ circular craft punch. Set aside.

Step 2: Turn the cork tile into a diamond position, and apply a strip of washi tape horizontally from the left corner to the right. Adhere another piece of tape diagonally across the upper half of the diamond to create two triangles, one twice as large as the other.

Step 3: In the bottom (largest) portion of the diamond, use alphabet stickers to spell out “done.”  (optional)

Step 4: Using the foam paintbrush, paint each section of the cork board a different color. Carefully paint over the “done” stickers.

Step 5: Slowly remove the tape and stickers and allow the cork board to fully dry. Set aside.

Step 6: Apply hot glue to the center of one side of a 1″ wooden circular tile, and adhere a thumbtack. Press firmly into glue and set aside to dry. Repeat for each chore/responsibility.

Step 7: Using school glue or a glue stick, adhere a chore icon to the front of each circular wooden tile. Set aside to dry.

images by Shauna Younge of Sweet Tooth

More Ways to Motivate Kids to Clean:

TRENDING
No content yet. Check back later!
X
Exit mobile version