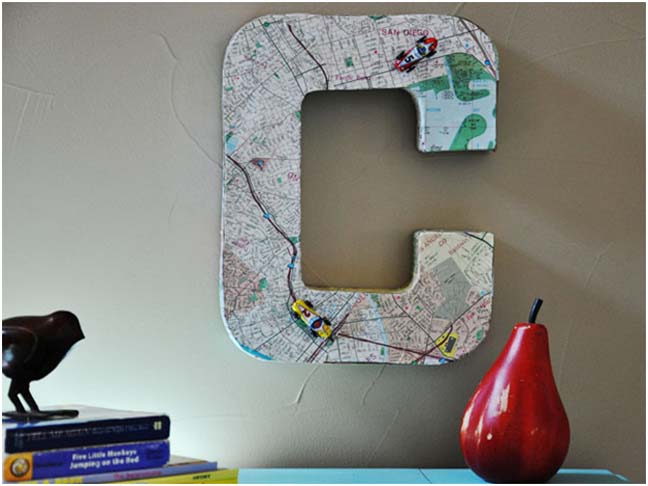
My sons are identical twins, and while they share the same taste in a lot of things, they are always looking for ways to be different from each other. They find themselves putting their names or initials on virtually everything they own, just for practicality’s sake.
Personalizing their bedrooms is no different; they both like to clearly distinguish their own spaces. These…
31 Sophisticated & Polished Monogram Projects for Grown-Up Living
-
DIY Marquee Letter Holiday Sign
Put your name, er, monogram in lights! Get the tutorial at Teal and Lime.
Image: Teal and Lime
-
Burlap Covered Monogram Letter
Add rustic style to your space with a little burlap. What's your letter? Get the tutorial at Uncommon Designs.
Image: Uncommon Designs
-
Monogrammed Soap Bottle
Declare the lavatory as your own with a monogrammed soap bottle. Get the tutorial at Design Mom.
Image: Design Mom
-
Baby's Breath Monogram
Fresh, simple, and delicate, this baby's breath monogram is a perfect decor addition in the spring, or any other time of year. Get the tutorial at Ruffled.
Image: Ruffled
-
Painted Linen Towels with Monograms
Who needs to buy fancy linens when you can make them yourself? And it's easy. Get the tutorial at Jenny Steffens.
Image: Jenny Steffens
-
Chalkboard Letter Monogram
Chalkboard letters are so cool, so any room you add them to will be cool, too. Get the tutorial at Maison de Pax.
Image: Maison de Pax
-
Button Monogrammed Pillow
Dress up a pillow for your swanky living room with buttons. Get the tutorial at It All Started with Paint.
Image: It All Started with Paint
-
Monogrammed Cloche
Step up the style of a glass cloche with a simple monogram. This look is classy and sophisticated for sure. Get the tutorial at A Night Owl.
Image: A Night Owl
-
Monogram Stamped Clay Key Chain
Carry your grown-up keys on a grown up key chain. Instant swank. Get the tutorial at Homey Oh My.
Image: Homey Oh My
-
Monogrammed Cutting Board
Food prep will be all about you with a monogrammed cutting board. Make a few. Get the tutorial at Ruffled.
Image: Ruffled
-
Monogrammed Embroidery Hoops
Commemorate special events with this sophisticated embroidered hoop DIY. Get the tutorial at Elizabeth Ann Designs.
Image: Elizabeth Ann Designs
-
Metal Letter Sign
Add a metallic element to your decor with this metal letter DIY. Get the tutorial at Craft Cuts.
Image: Craft Cuts
-
West Elm Monogrammed Towels
Your kitchen never looked so good. These West Elm towels will dress up your cooking spot tout de suite. Get the tutorial at Oleander + Palm.
Image: Oleander + Palm
-
Monogrammed Clothespin Wreath
Try a unique spin on a wreath with clothespins.Get the tutorial at Inspiring Creations.
Image: Inspiring Creations
-
Typography Wall Art
Fresh flowers don't need to live in a vase. Be bold and hang them on the wall. So sophisticated. Get the tutorial at Paper & Stitch.
Image: Paper & Stitch
-
Simple & Elegant Monogrammed Hand Towels
What's better than regularly monogrammed hand towels? Sparkly monogrammed hand towels! And they're so easy to make. Get the tutorial at Lia Griffith.
Image: Lia Griffith
-
Stick-Covered Monogrammed Letter
Every room needs a bit of nature. Sticks count! Get the tutorial at The Happy Housie.
Image: The Happy Housie
-
Monogram Bed Tray
Eat/work/rule your life from bed with a bed tray emblazoned with your monogram. Rock it! Get the tutorial at Homeroad.
Image: Homeroad
-
Moss Letter
It's alive! Hang a bit of living nature with a moss monogram for the door. Get the tutorial at Design Dining Diapers.
Image: Design Dining Diapers
-
Monogrammed Pine Cone Wreath
For a different time of the year, make a simple wreath with pine cones for the door. It's the perfect outdoor decor. Get the tutorial at Mommy Suite.
Image: Mommy Suite
-
Initial Mugs
Drinking coffee never looked so good. Get the tutorial at Relocated Living.
Image: Initial Mugs
-
Monogrammed Napkin Rings
Dress up the table with monogrammed napkin rings. Cue the coolness. Get the tutorial at Family Chic.
Image: Family Chic
-
Monogrammed Clipboard
Even clipboard business can be good-looking with this clipboard DIY. Get the tutorial at DIY Show Off.
Image: DIY Show Off
-
DIY Leather Cuff Links
"And as long as I've got my suit and tie..." and leather cuff links. These make for the ultimate cool look. Get the tutorial at Almost Makes Perfect.
Image: Almost Makes Perfect
-
Monogrammed Coasters
No one wants water rings. Monogrammed coasters will keep that from happening. Get the tutorial at One Artsy Mama.
Image: One Artsy Mama
-
Monogrammed Candle Holder
This cute and sophisticated tutorial is great for holiday gift-giving.
Get the tutorial at Craft Texas Girls.
Image: Craft Texas Girls
-
Scripted Font Monogrammed Wreath
This is a great, bold fall statement.
Get the tutorial at In My Own Style.
Image: In My Own Style
-
Sheet Music Monogram
A perfect idea to hang over the piano or wherever your kids practice music.
Get the tutorial at The Country Chic Cottage.
Image: The Country Chic Cottage
-
Monogrammed Dipped Glassware
When I dip, you dip, we dip.
Get the tutorial at Dukes & Duchesses.
Image: Dukes & Duchesses
-
Stenciled Monogrammed Placemat
Step it up a notch: add placemats to your table. And while you're at it, add a monogram to the placemats. Get the tutorial at DIY Inspired.
Image: DIY Inspired
-
Monogrammed Altered Book
I found something really unique: alter a book to your monogram and impress all your friends. Get the tutorial at Ashbee Design.
Image: Ashbee Design
