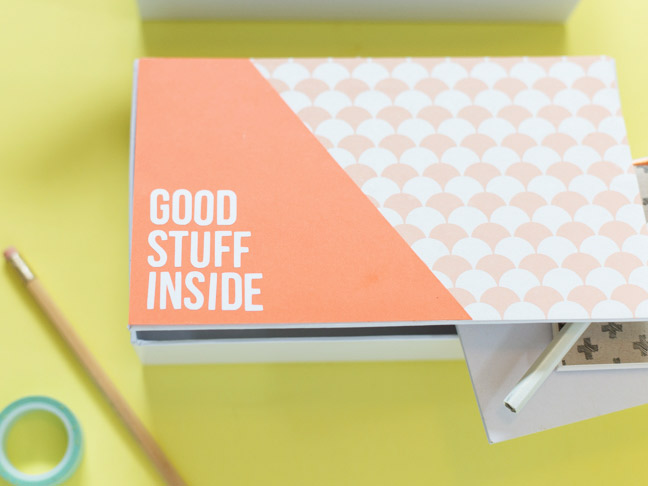
DIY Customized Pencil Boxes


When I was little, picking out a pencil box for the school year was a big deal. It had to be something cool, and it had to be something that you were going to love for the whole year. So if you picked something trendy in September, you ran the risk of it being totally lame by June. Oh, the agony! I would have totally jumped on this little DIY in my pencil box buying days, and made myself a little custom number. These personalized pencil boxes are perfect for families to make together for the students who are headed back to school. Customize it with a name, a monogram, a subject matter, or just a fun phrase. And the very best part? You’ll have a one-of-a-kind pencil box to send off to school with your kiddo!

Supplies:

  • plain cardboard pencil box
  • patterned paper
  • colored card stock
  • glue stick
  • scissors
  • alphabet stickers OR stick-on vinyl and our printable alphabet template

Instructions:

Step 1: Cut two pieces of patterned paper—one to cover the top of the box and one to line the bottom of the inside. Cover the back of each piece with a glue stick and smooth them onto the box.

Step 2: Cut a piece of colored card stock at a diagonal to cover a portion of the top of the box. Glue this piece over half of the patterned paper on the lid.

Step 3: Decide on a name or phrase to include on the front of your box. If you’re using alphabet stickers, you’re all set! If not, print out the alphabet template. Trace letters onto your stick-on vinyl and cut them out.

Step 4: Carefully place the stickers or vinyl letters onto the front of your box, spelling out your phrase.

Step 5: Fill the pencil box with supplies for your little scholar and wish them a great year at school!


More DIYs for Back to School:

TRENDING
No content yet. Check back later!
X
Exit mobile version