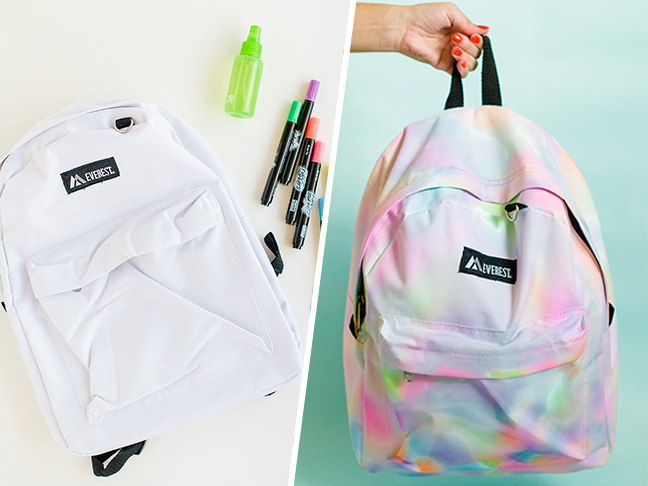
Forget spending an arm and a leg on a cool new backpack this year! As a child, I was always itching to have the most unique and one-of-a-kind bag to show off at school. This fulfills all my childhood dreams, and if your child is a color-lover like me, they’ll be proud to rock this watercolor backpack while strolling through the halls at school. Best part? It takes less than thirty minutes to make and costs less than $20. I feel like this school year is a win already.
Supplies:
- plain white backpack
- fabric markers
- spray bottle filled with water
- paper towel
Instructions:
Step 1: Start by spraying the backpack with a very light mist of water. Don’t soak it! You want it to be barely damp so the marker slightly bleeds as you color.
Step 2: Using the markers, add color over the entire surface of the backpack. Be sure to alternate the colors you’re using. Don’t worry about saturating the bag with ink. Scribbles are just fine and will still get the same effect.
Step 3: Once you’ve covered a portion of the backpack’s surface with marker, spritz some water over the ink. The more water you add, the more the colors will bleed together, creating a cool watercolor look.
Step 4: Use a paper towel to soak up any extra water that isn’t being absorbed.
Step 5: Seal the color with heat by tossing the backpack in the dryer for a few minutes until it is dry again. Alternatively, you can wait for the backpack to dry and then run over the colorful surface with an iron. It removes wrinkles as a bonus!
This project is so easy to make. I honestly started and finished it while my daughter was eating her breakfast! Try this technique out on other items like shirts and socks to add colorful fun to your family’s wardrobe!
More DIY Bags:
