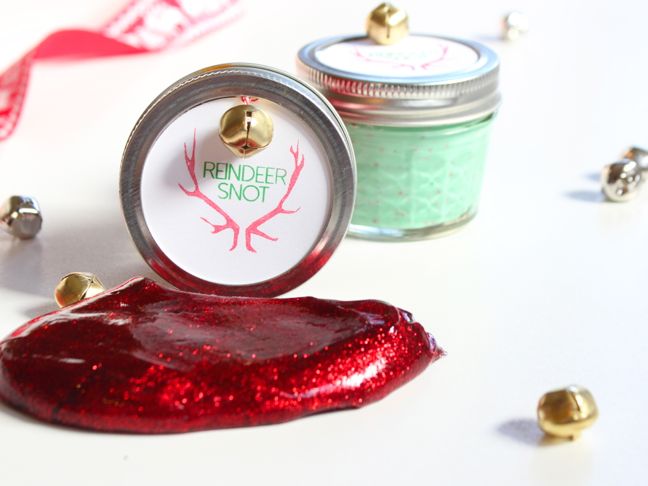
DIY Stocking Stuffer: Reindeer Snot

I plan to make Christmas morning extra fun this year with creative and unique stocking stuffers. My kids will still find some of their typical small presents like hair ties, gum, matchbox cars, Nerf darts, lip gloss, markers, and notepads, but I will surprise them with a few new ones that are “outside the stocking”.

One of those gifts that I’m excited about them finding in their stockings this year is this DIY homemade slime. Since I’m in the holiday spirit, I will lovingly refer to this particular slime as Reindeer Snot. My kids are snot-nosed half the winter anyway, so why not keep the snot flowing, only holiday-style with a little extra sparkle.  Reindeer have snot since they fly all night in the cold, right? And since they’re magical creatures from the North Pole, there’s no doubt that their snot sparkles. It all makes total sense.

With a tissue close by, I got to work on this fun DIY stocking stuffer. Here’s how I did it.

Supplies

  • Borax
  • Water
  • Disposable spoon or stir stick
  • Measuring cups: 1/2 cup and 1 cup
  • Bowls: 3
  • Glue: It’s easiest to use glitter glue (I like Horizon glitter glue). However, white glue or clear glue will also work.
  • Glitter (if you’re not using glitter glue)
  • White card stock
  • Containers with lids, like mason jars
  • Stamps or markers for labeling
  • Twine

Directions

Step 1: Gather all materials.

Step 2: Fill one bowl with ½ cup glitter glue.

Step 3: Fill another bowl with 1 cup room temperature water and 1 teaspoon Borax. Mix well.

Step 4: Pour the Borax and water solution into the bowl with the glue.

Step 5: Stir the glue and water mixture together. During my slime-making adventure, the glue formed into small pieces at first, and then when I used my hands to gather the glue, it formed a nice slimy ball. The texture is amazing! It will not absorb all the water. If your glue is too sticky and stringy, add more Borax, 1 teaspoon at a time.

Step 6: Remove the slime from the solution, and place it in a separate bowl. The texture of the slime gets better with time. If you plan to use white glue or clear glue, you will need to add the food coloring and glitter to the glue and stir it together before you add the water and Borax solution.

Step 7: To package the homemade slime into stocking stuffers, place it in small mason jars. If you plan to make these for holiday gifts for kids classrooms like I did (and need a more affordable option), I bought these mini cups, and plan to fill them for kids. Kids would love to help make slime for their friends.

Step 8: Make labels for the Reindeer Snot. I used my favorite new craft toy, the Silhouette Mint, to design my Reindeer Snot stamp. If you do not have a Mint stamp-making machine, you can use letter stamps to spell it out, design a tag on the computer, or write Reindeer Snot on a small piece of paper. Punch a hole in the top of the label, and with red twine, attach a mini jingle ball. I made the circle labels slightly smaller than the top of the mason jar lid so it could fit in the center of the circle, and I could easily add the outer ring to hold it in place.

This is a hit with the family. It’s in the potty-talk category, so it’s a sure thing with kids.

Important notes: DO NOT eat the slime, and do not let your children eat the slime. We did not experience any skin reactions when playing with the slime, but it’s a good idea to wash your hands when you are done playing with it. The slime will eventually have to be discarded; however it can last for several weeks in the refrigerator in a plastic bag or airtight container. It is OK if left outside of the refrigerator, however the cold helps inhibit the growth of bacteria and mold, so it will last longer.

TRENDING
No content yet. Check back later!
X
Exit mobile version