Winter is taking it’s toll on the US, with 49 of our 50 states spotted with snow (Florida is the lone wolf here, even Hawaii has snow now). The icy chill of winter can leave us excited for hot cocoa and warm fires, but can also take a toll on our moods. What to do when you’re stuck inside all day?
Fight those winter woes with pom poms, one of my favorite almost effortless crafts with seemingly endless possibilities. There are tons of how-to guides for pom poms, and I’d like to share a few with you — hopefully a little something to inspire anyone with winter cabin fever! Click here to see Part 1 of this DIY.
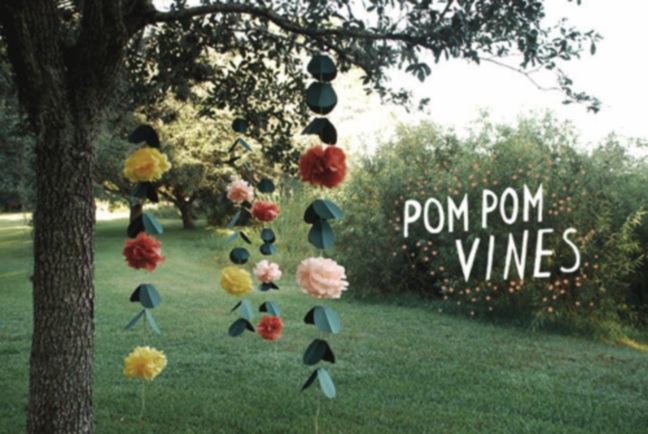
Paper Pom Pom Garland for any occasion
Project created by Anna Bond of Rifle Design for Once Wed
Garlands are a classic favorite for decorating any space — whether it be a party space or a child’s bedroom. You can make a garland out of pretty much any craft supply: paper, yarn, or fabric. Yarn pom poms are being used frequently these days for decoration, especially because they can be made from any scrap yarn. Most of the pom poms we see are made from yarn, but paper can make a great pom pom as well! Use them as flowers or simple poufs, paper pom poms can brighten up any space and make for easy clean up.
Supplies:
1. Cutting mat – optional, but good if you like to cut with an exacto knife. If you cut well freehand with scissors, then this supply is not necessary.
2. Twine – or any type of sturdy string/yarn. This will be used to hold up and hang your vine.
3. Paper – any color, used for accents between the paper pom poms. If you’re going for a floral theme, green might be nice to use as leaves between the flowers.
4. Tissue Paper – any colors, used for your pom poms
5. Scissors
6. Wire – used to hold your pom pom together in the middle. Floral wire is suggested here, but string or a thin, flexible wire can be substituted here.
To create the pom poms:
Stack 7 sheets of tissue paper and accordion fold them together, with 7 folds each about 1 inch wide. Wrap wire or string around the center to create a divide. Carefully peel apart each layer, fanning it out toward the center until you have a full ball.
To create leaves/center accents:
Cut paper to any desired shape, a silhouette of a figure 8 if you desire leaves. Fold each leaf lengthwise and widthwise to create a crease in the center. Poke a hole in the center to pull your twine through.
To assemble the garland:
Attach each pom pom to the twine strand by stringing the twine through the center wire, and knotting it around the wire to hold it in place. Add leaves (or any center embellishments) and pom poms in any order you’d like, to create a full garland.
This garland is simple enough for even the novice crafter, but elegant enough to impress the experts. Hang it in a nursery with pastel colors or use it for birthday party decorations by adding bright colors and fun shapes between the pom poms — the possibilities are truly endless. I hope you find some inspiration in these pom pom crafts!
Also, if photo-instructables are not your thing, check out this how-to video from Table Tonic that shows how to make yarn pom poms.
Photos courtesy of Once Wed and Poopscape Projects
