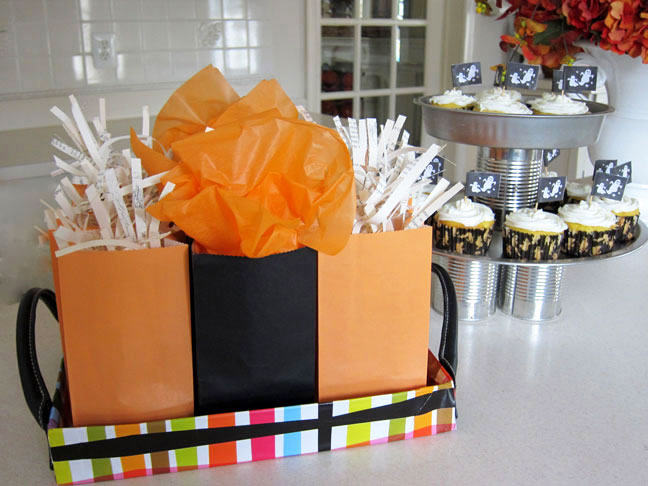
Trash + The $ Store = Bake Sale Style

You know you can’t just make brownies or heaven forbid bring a clamshell package of store bought cookies!  You know you have to make something wonderful, something every kid and adult will love and want to buy. One way to do this is to bring your goods on a beautiful serving platter.  The problem with this is:

#1 –  You may leave the event before the sale is over which means leaving your pretty serving platter behind. It could get lost or broken.

#2 You could also stick everything in a box – but that doesn’t look very appealing.

Trash + The $ Store to the rescue. 

They are where you will find all the materials you need to make bake sale serving pieces that if left behind you won’t mind losing. If you do take it home, both the ideas that I am about to show you are flat or can be taken apart for easy storage.  So when the next bake sale comes around you can easily grab it and go to the bake sale in style.

Bake Sale Betty Box

Materials Needed:

  • Bottom of a box – You can easily find them at Costco and WalMart – just ask.
  • Giftwrap
  • Spray adhesive

1. Measure giftwrap so it will wrap around the box on all sides. Cut out the corners.  Add spray glue to the bottom of the box. Let it get tacky and then center the box on the paper. Smooth with your fingers.

2. Spray the sides of the paper with glue and then attach the sides to the box so it wraps around the edge and into the inside.

3.  Trace the bottom of the box on gift wrap and cut out. 

4. Glue and place it inside the box.

Place your bake sale goodies or treats inside. 

Optional:  I save bits and pieces of items I throw away . I recently threw an old handbag away, but ripped off the handles.

I hot glued them onto the box to create some interest and another way to carry the box.  You can do the same with some ribbon.   To attach the ribbon – make two small holes in each side of the box and thread the ribbon through.. Make a know to each end inside the bos to secure.

Bake Sale Betty Tiered Plate Stand

Displaying your goods on a tiered stand gives them height that will stand out from the rest.

Materials Needed:

  • 4 Soup Cans
  • $ Store Pizza Pan and Cake Pan
  • Hot Glue or Museum Putty  – You can find it at Home Depot. It is strong hold putty that is removeable.
  • Optional:  Spray Paint and/or Ribbon


1. Place a glob of hot glue on the bottom of three cans.  Use 3 dots of Museum Putty if you want to take the stand apart to easily store when not in use.


2.  Center and attach to the bottom of pizza pan.


3.  Add a glob of glue to putty to the bottom of a 4th can and attach to the bottom of the cake pan.  Place 4 dots of glue or putty to the top of the 4th can and place it in on the center of the pizza pan.


4  Add your baked goodies.  You can leave the stand plain, spray paint it, or embellish using glue to attach ribbons. 


To carry this to the event.  Open a very large plastic bag from your favorite department store. Place the stand with your baked goods inside making sure it is centered on the bottom of the bag.  Carefully bring the sides of the bag up around it and tie.

TRENDING
No content yet. Check back later!
X
Exit mobile version