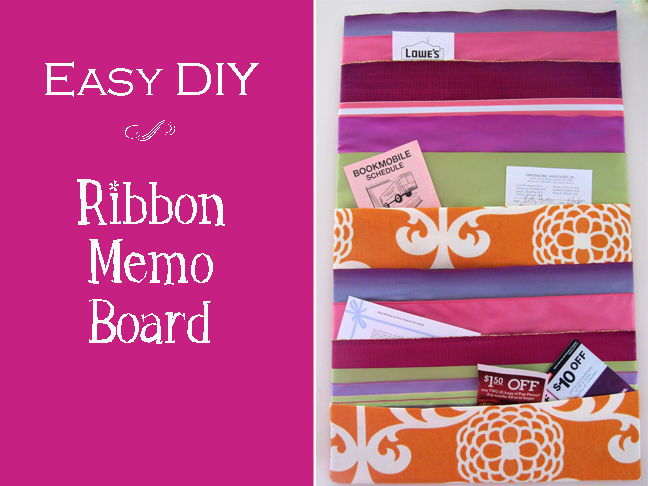
I always get the overwhelming desire to get everything in order in an efficient and pretty way come January. This year I am starting with my kitchen. Instead of using a drab cork memo board or cluttering up the door of my refrigerator, I made a memo board with ribbons. It is a very easy way to keep all those little papers and reminders in one easy to access place.
Each ribbon is a pocket for tucking in notes, invitations, receipts, etc. No tacks necessary so your memos stay hole free. I fitted my board to fit into one of my kitchen cabinet doors, but it is so colorful and pretty you may not want to hide it.
Before Kitchen Cabinet Door
After Ribbon Memo Board mounted in the recess of the door.
Supplies Needed:
- Foam Board – I got mine at the dollar store.
- Ribbons – enough to cover the board. Cut each about 3-inches wider then your board. Use a variety of widths for added interest. I used a few wired edge ribbons – they work, but they don’t lay as flat as non-wired edge ribbon.
- Tape
- Duct or Packaging Tape
- Straight Edge
- Mat Knife
- Scissors
- 4 – Sticky Back Velcro Dots
1. Cut your board to the desired size. Determine how you want the ribbons lined up and then set them aside. I wanted to use a scrap of fabric I had to add more color and pattern to my board. I pressed the raw edges over with an iron to create sharp creases so it looks like a wide ribbon.
2. Starting at the top of the board – lay the top ribbon across and wrap the ends around the back of the board. Make sure it is taut. Secure ends on back with tape.
3. Turn board back to front and attach duct tape along the entire length of the bottom edge of the ribbon. Wrap the ends of duct tape around the back and tape down. This will turn each ribbon into a pocket. Add the next ribbon under the first- slightly overlapping it. Secure ends onto the back with tape and add the duct tape along the bottom edge of the ribbon. The next ribbon will hide the duct tape. Repeat this process for the rest of the ribbons until you have the board covered.
The back of the board will look like this when all the ribbons and duct tape are attached. To attach the bottom fabric or ribbon bring about 2 inches of the bottom edge to the back of the board and tape down as if you were gift-wrapping a box.
Secure all the ends of ribbon with duct tape on the back.
Add a Velcro dot to each corner on the back. Remove the adhesive and then press it onto the door or wall where you want it to hang.
