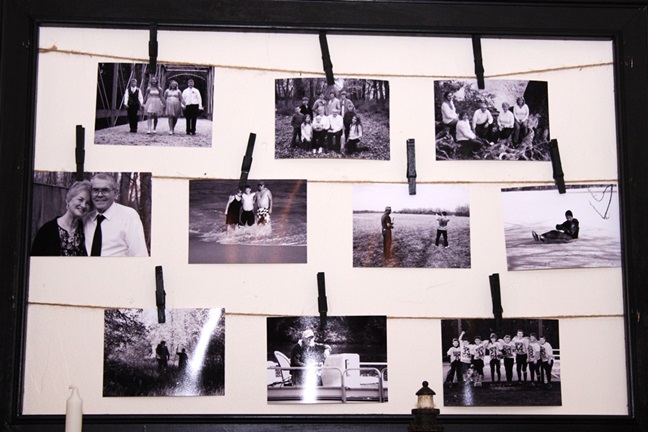
DIY: Framed Photo Installation

A gorgeous new SoftSpring carpet from The Home Depot inspired and entire living room renovation in my house, which included this beautiful DIY Photo Installation. Learn how to DIY a family memory keepsake that doubles as sophisticated home decor. Read about my living room renovation here.

Materials:

  • molding, measuring 12 feet x 3 inches
  • 4 wooden dowel pins, measuring ¼ inch by 2 inches
  • wood glue
  • wood putty
  • 2 picture hangers
  • 1 can black satin spray paint
  • 10 – 12 clothespins
  • 126 inches of twine or ribbon
  • 6 small screws
  • 2 medium screws for hanging
  • 10 – 12 black and white photos, measuring 5 inches by 7 inches

Instructions:

Step 1: Cut the molding so you have 2 pieces at 42 inches, and 2 pieces at 30 inches long.

Step 2: Cut the ends at 45 degree cut with a circular saw.

Step 3: Drill one ¼ inch hole in the center of each end on the top and bottom pieces (the longer 42 inch pieces).

Step 4: Glue in a ¼ inch by 2 inch wood dowel in each of the holes so one inch is sticking out.

Step 5: Drill a ¼ inch hole in the center of each of the side pieces ( the shorter 30 inch pieces).

Step 6: Lay all 4 pieces on a large flat surface, glue all 4 corners together to make the frame with the dowel pin holding it in place.

Step 7: Once the glue has dried fill in any cracks with wood putty to make a smooth corner.

Step 8: Once the wood putty has dried, sand off any excess so the frame is smooth.

Step 9: Sand the whole frame lightly so it has a smooth finish.

Step 10: Paint the frame and the clothespins with black satin spray paint, or your favorite color.

Step 11: On the back side of the frame install hangers evenly so the frame can hang level when hung on the wall.

Step 12: Add the string to the back of the frame by attaching 3 small screws to the back of each side of the frame, evenly spaced at the same level on each side.

Step 13: Attach the string to the screws and stretch it across the frame.

Step 14: Use a level and two medium screws to hang the frame on the wall.

Step 15: Use the clothespins to attach 10 – 12 of your favorite black and white 5 inch by 7 inch photos.

Step 16 (optional): We added a wooden shelf underneath the photo installation to diplay decor item. (Learn how to make the DIY Wood Shelf here.) 

*This post was sponsored by The Home Depot. 

TRENDING
No content yet. Check back later!
X
Exit mobile version