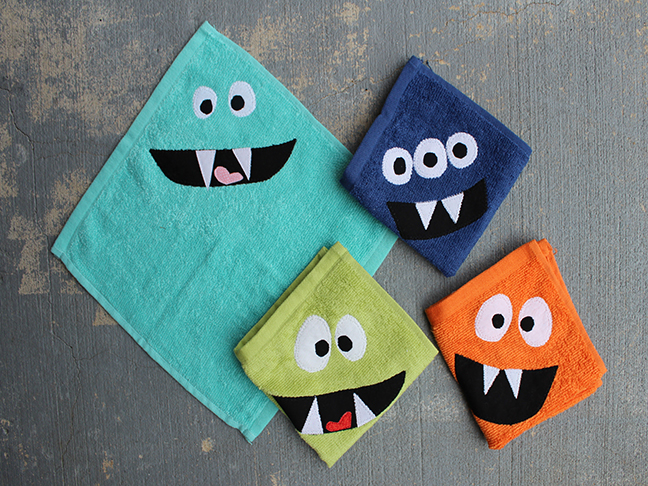
DIY Monster Face Cloths

This is an easy project I made with store bought face cloths and scraps of fabric. I even got my kids involved to make these scary, Loch Ness inspired bath creatures. They drew the inspirations, and I brought them to life. If you have some basic sewing skills, these are the perfect handmade baby shower gift! Because the cloths are different colors and sizes, you can stock up on clearance cloths for next to nothing, and spend an afternoon making a bunch of them.

Supplies:

  • cotton face cloths in a variety of “monster” colors
  • fabric scraps in white, black, and other colors
  • thread to match fabric scraps
  • sewing machine and related supplies
  • fusible web (Pellon EZ Steam works great. Check manufacturer’s package for directions and details.)
  • paper and pen for drawing
  • iron and ironing board

RELATED: 31 Free Freezer Paper Stencil Templates for T-Shirts and Totes

Instructions:

Step 1: Find inspiration for your monsters. Draw a variety of monster face details—eyes, teeth, and mouths.

Step 2: Cut 1 piece of fusible web paper in half. Lay the fusible web onto your work surface, smooth side facing up/textured side down. Draw the eyes and teeth on one side. Draw the mouths and eyeballs on the other side. 

Step 3: Lay fabric onto your work surface. Finger-press the wrinkles out. Lay the mouth and eyeballs on the black fabric and the eyes and teeth on the white fabric. Iron in place.

Step 4: Cut out all features.

Step 5: Lay 1 face cloth onto your work surface. Start with the eyes. Turn and peel the backing from the fusible web. It should feel like a sticker when peeled away. Lay the eyes onto the face cloth and iron in place. Change to white thread in your sewing machine. Place into your sewing machine and applique around the outside edge. 

Step 6: Repeat step 5 for all other features—the mouth, eyeballs, and teeth. Layer each feature and stitch down as you go. Change thread color in your sewing machine to match the feature each time. Take your time and have fun!

Step 7: On the next face cloth, try adding new features such as a tongue or eyelids. 

More DIY Craft Projects:

TRENDING
No content yet. Check back later!
X
Exit mobile version