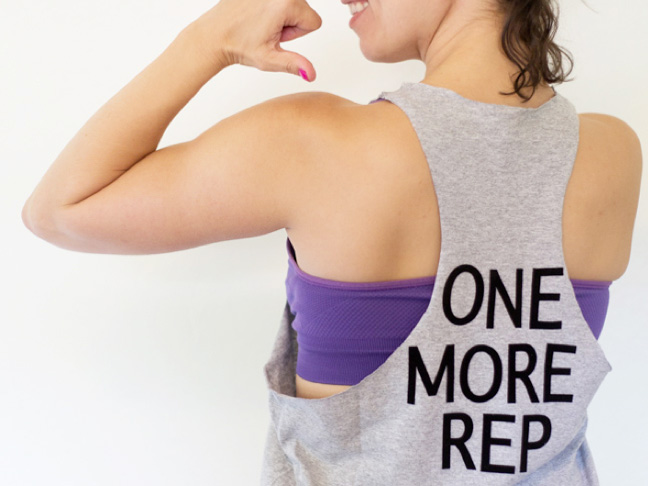
I admit it. I need a refresh to my workout routine. For the longest time, all summer, I hopped out of bed before anyone else in my house was awake, tossed on my gym clothes, and headed out for the 6 AM spin class. But I’ve been slacking off and my attendance has been spotty, to say the least. I need a workout shakeup! So I decided to whip up some inspiring tees for myself, as a means of a bit of motivation. You can make some for yourself too, and bonus if you can upcycle some of your dude’s old shirts that he never wears! You just need a few other supplies to get this DIY rolling, and pretty soon you’ll have a whole gym wardrobe full of healthy inspiration. Oh, and you’ll be glad to know I wore one of these workout tees when I got myself to spin class this morning.
Supplies:
- plain tees (upcycled or old tees are great—raid your husband’s stash!)
- iron
- iron-on letters
- ironing paper
- pen
- scissors
Instructions:
Step 1: Decide if you’d like to cut up your tee at all. You can cut them in an array of different designs or leave the tee intact. We tried a few different options. For a muscle shirt look, just cut off the sleeves of your tee.
Step 2: For a racerback look, first cut off the collar. Then with a pen, trace a long line from an inch outside the cut collar to just below the armpit. Cut that section away. Flip the shirt over, trace an even narrower line along the back, and cut the extra back section away.
Step 3: Decide on your lettering. Peel away the letters you’d like to use and lay them on the tee (front or back!).
Step 4: Lay down your ironing paper over the letters. With an iron on high heat, press down firmly over the letters for about sixty seconds, or until they are adhered to the tee.
Step 5: Rock your new workout tee at the gym, and do a couple of extra reps for me!
More DIY Style:
