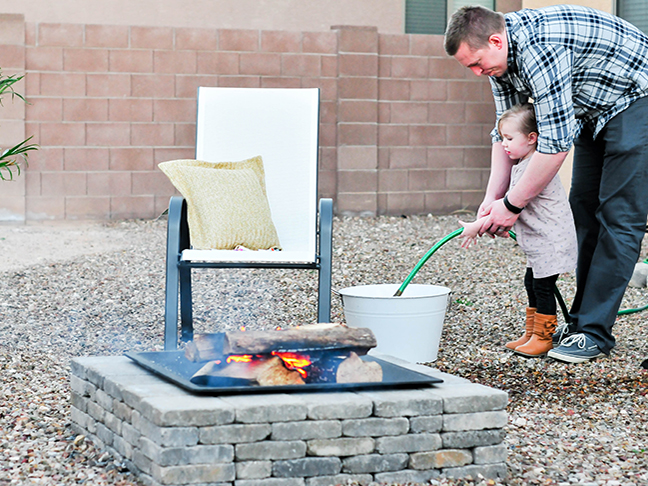
One of the perks of living in southern Arizona is the weather. It’s warm enough right now to spend the evenings outside with the family. We would love to spend time in our backyard, but it was seriously lacking in the “fun” department. We’ve had a DIY fire pit on our to-do list, but since we are renting, we needed to come up with something that was easy to pick up and move when the time came to relocate. This simple version can be made in under an hour and requires very little masonry skill. If you can lay down a brick, you’re halfway there! Let’s do this.
RELATED: DIY Tree Swing for Kids & Adults
Supplies:
- 26″ steel fire bowl (Mine is from Target, but Craigslist is a great source!)
- 72 square RumbleStone bricks measuring 7″ x 7″
- 16 skinny RumbleStone bricks measuring 3.5″ x 7″
- level
Instructions:
Step 1: Scout out the location in your backyard. We’re lucky enough to have a big backyard, so spacing it away from the house and any nearby trees wasn’t an issue. Aim to keep the fire-pit location twenty feet away from your house, your fence, and any trees.
Step 2: Lay down the bottom layer of bricks. For the square pit, each side is five bricks wide. Be sure to check the level as you go. Our backyard has zero grass. Normally, that’s just the worst thing in the world, but a gravel bottom makes for a great base for a fire pit.
Step 3: Lay the second layer of bricks, taking care to layer them over the threads between the bricks below. (See above photo.) The skinny bricks will help you finish this layer.
Step 4: Continue layering your bricks. We did a total of five layers following the amounts below.
- Layer 1: sixteen square bricks
- Layer 2: twelve square bricks, eight skinny bricks
- Layer 3: sixteen square bricks
- Layer 4: twelve square bricks, eight skinny bricks
- Layer 5: sixteen square bricks
The final layer of bricks is made up of all square bricks to cover up any imperfections.
Step 5: It’s time to place the steel fire bowl on top!
It just rests comfortably on the top layer of bricks. After each fire, you can easily toss the ash and rinse out the bowl with a hose.
This steel bowl came with a matching grate to place over the top. Both the steel bowl and grate can withstand the heat of the flames, making this a better option to contain ash, embers, and bits of burning paper from flying out of the fire. Safety first!
Our daughter really enjoys hanging out with us each night around the fire. We’ve had to have a fire safety discussion with her. She’s only two years old, but it never hurts to start warning children about fire dangers early on.
Before we start a fire, we have our daughter fill up a large bucket with water and explain to her that this is used to put out the fire. She understands that flames are hot and that she’s not allowed near the fire when Mom and Dad aren’t around.
Here are a few tips for fire pit safety for the whole family. These are especially important with young children in the home.
- Position the pit at least twenty feet away from your house or low-hanging branches.
- Place the fire pit on a non-flammable surface such as dirt, gravel, rock, or concrete.
- Have a bucket of water or sand nearby before each fire session.
- If your fire pit is above ground, be sure to use a grate to contain any ash or embers.
- Place dirt or rocks around the fire pit to prevent any fire on the ground from escaping.
- NEVER leave the fire unattended.
- NEVER leave children or pets near the fire unattended.
- Don’t wear loose-fitting or flammable clothing near the fire pit.
- Do not rest your feet or shoes on the edge of the fire pit.
- Put out the fire with water and/or dirt.
- Keep a fire extinguisher nearby to put out uncontrolled fires quickly.
- Do not dispose of hot ash. Wait for the ash to cool before placing in a metal tin.
And there you have it! No mortar required. When used safely and properly, a fire pit can be a wonderful addition to any yard. Happy roasting!
More Outdoor Entertaining Ideas:
