String Art

Amazingly Easy DIY String Art Tutorial (No Hammer Or Nails Required)

diy-string-art-red-balloon-let-it-go-beads-cork

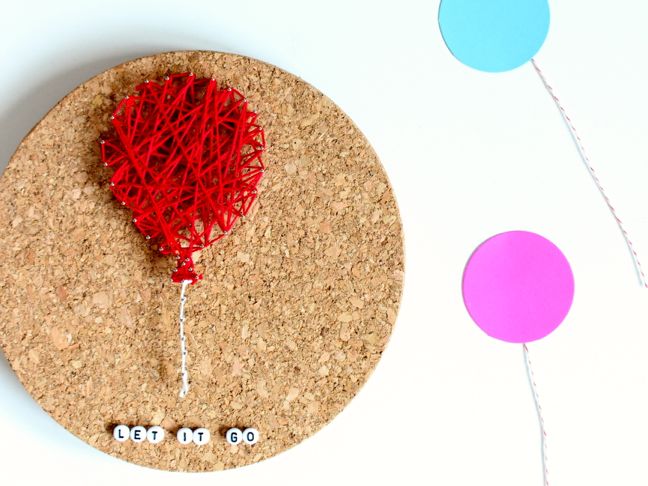
DIY string art has intimidated me for years, because of the hammer and nails most projects require. I’ve been known to hammer my finger every now and then– plus, string art didn’t seem child-friendly. Then I decided to try it without the tools. It was a success! My daughter and I created our first-ever DIY string art our own way, without the wood, hammer, and nails. My daughter already called dibs on the DIY string art for her room, so I guess I’ll be pushing pins and wrapping more string around them in the future for a masterpiece of my own.

Here’s how I did it.

Supplies:

  • Cork Heat Trivet from Ikea
  • Pins, dressmaker (pins should have a wider top so the string doesn’t slide off the pin)
  • Embroidery string, red
  • Spray adhesive or Gorilla Glue
  • Thimble
  • Letter beads
  • Hot glue and hot glue gun

Instructions:

round-cork-and-spray-adhesive

Step 1: Prepare the canvas for pins by spraying permanent adhesive onto the bottom of one of the cork pieces and pressing it onto the other piece. Press down firmly and wait about 10 minutes for it to permanently stick together. The reason it has to be a double layer of cork is to make sure it’s thick enough, so the pins don’t poke through the back.

cork-black-and-white-balloon-push-pins

Step 2: Find a design online that looks easy to trace with pins. Print it out and cut it out. I scaled my balloon image in Microsoft Word.

black-and-white-balloon-thimble-cork

Step 3: Place the design on top of the cork. You may tape the design to keep it in place.

black-and-white-balloon-with-push-pins

pins-along-the-border-of-a-photo-of-a-black-and-white-balloon

thimble-pins-around-the-border-of-a-black-and-white-balloon-illustration

Step 4: Press pins into the cork along the border of your design. I spaced my pins about 1/2 to 1 inch apart. I pressed the pins into the cork with my fingers, and then used a thimble (to spare my fingers) to press them deeper into the cork.

cork-pins-red-string

Step 5: Once all pins are in place, gently rip and pull the paper off the cork to reveal the design.

red-string-tied-around-a-pin-pushed-into-a-cork

Step 6: Tie a double knot around one pin with the string.

hands-crafting-a-diy-string-art-with-red-string-and-pins-on-a-cork

red-string-wrapped-around-pins-in-cork

Step 7: Wrap the string in all different directions from pin to pin until the design is full of colorful lines. Every pin should have string wrapped around it. Pull the string taunt as you move from pin to pin, but not so tight that it bends or moves the pins. Once the string has been wrapped around all the pins, tie another final knot on one of the pins.

red-and-white-string-wrapped-around-pins-on-cork-diy-string-art

Step 8: Repeat these steps for every portion of the design.

let-it-go-black-and-white-beads-on-cork-material

diy-string-art-red-balloon-on-a-round-cork

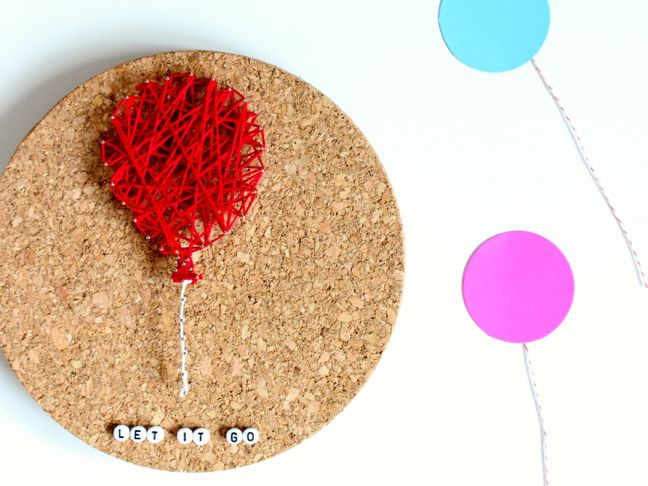
Step 9: Add a phrase with letter beads. Since my design was a balloon, the phrase “Let it go” fit perfectly. Those three simple, yet powerful, words are a good reminder to let go of the things that I cannot control. For my daughter, it’s about learning to let go of the mistakes she makes, and growing from them. This step is optional, but if you want to add a phrase, use hot glue to glue letter beads to the cork.

diy-string-art-red-balloon-let-it-go-beads-cork


Step 10: Hang on the wall.

TRENDING
No content yet. Check back later!
X
monitoring_string = "b24acb040fb2d2813c89008839b3fd6a" monitoring_string = "886fac40cab09d6eb355eb6d60349d3c"