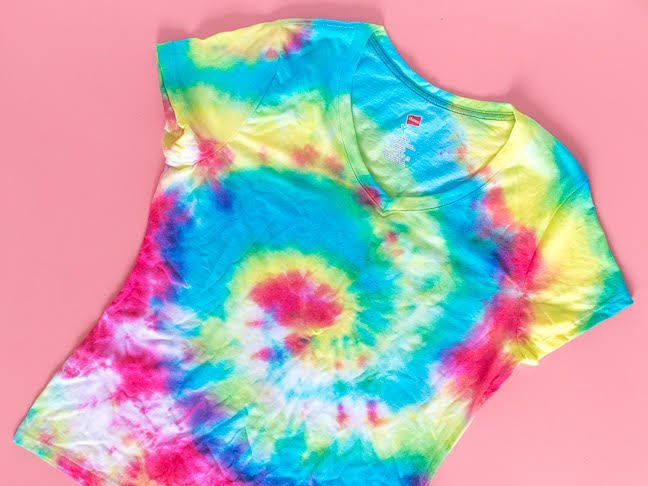
How to tie dye? It’s sort of an essential skill right now, since the ’90s are back. (And yes, I’m loving seeing the tie dye, overalls, chokers, and platform shoes from my childhood!) My mom taught me how to tie dye a shirt (and other fabrics) when I was a kid, and it’s still just as fun to get my hands dirty and tie dye fabrics in a rainbow of colors and patterns.
You have a few options for tie dyeing fabrics: buy a tie dye kit (see below) or purchase individual dyes to make specific color palettes. Do whatever works for your projects, but I highly recommend the pre-packaged tie dye kits for beginner tie dyers. There are multiple color options, and the kits include the dye, bottles, gloves, and rubber bands (all of the supplies that you will have to purchase separately otherwise). Just be sure to wear gloves and protect your workspace.
Ready to get started? Here’s how to tie dye shirts, blankets, placemats, and even backpacks, in a few easy steps.
Supplies:
- Tie dye kit or various of dye colors
- Water
- White fabric, such as a t-shirt
- Rubberbands
- Plastic/rubber gloves
- Squeeze bottles
- Plastic and paper towels, for work surface
Step 1: Completely cover your work surface with plastic and/or paper towels to catch any mess from the dye. For reduced mess, tie dye outdoors.
Step 2: Choose your design. Tie dye shapes are determined by the bunching of the fabric and rubber bands. To create the classic spiral shape as seen here, lay the fabric out flat and pinch the middle with your fingers. Twist the fabric in one direction to bunch the fabric in a spiral pattern and continue, pressing the fabric flat, until it is all bunched into a circle.
Other shapes can be achieved by wrapping rubber bands around the middle to make a circle starburst or by rubber banding random sections to create a crumpled look. See the insert in a tie dye kit for more examples.
Step 3: Wrap four rubber bands tightly around the fabric, evenly spaced.
Step 4: To mix the dye, empty powder into the squeeze bottles or follow alternative dye instructions. Add water until bottle is almost full and press cap on tightly. With gloves on, shake the bottle until the powder has completely dissolved. Repeat with all colors in separate bottles.
Step 5: Over the covered workspace, begin gently squeezing the dye to completely cover each section of the fabric. For the spiral pattern, fill in each triangle shaped section between the rubber bands with one color at a time until it is entirely covered. For best results, avoid overlapping color too much as it could cause some areas to turn brown.
Step 6: Turn over the fabric and continue dyeing until the entire piece is saturated with color. The fabric should be completely saturated with dye so that the color reaches between the folds but not so much that it is dripping wet.
Step 7: Lay out a piece of clean plastic wrap and place the bundled fabric on top. Wrap tightly. This helps keep the fabric damp while the color soaks. Set aside for 6 to 10 hours for the color to set, and note that the longer you wait, the brighter the colors will appear.
Step 8: Once the preferred amount of time has passed, rinse the fabric in the sink or outdoors with a hose. Wear gloves to protect your hands from the dye, and rinse thoroughly until the water runs clear. Remove the rubber bands and continue rinsing until the water is clear.
Step 9: Lastly, wash and dry as usual before wearing. The colors should remain bright and the pattern should not run.
Now you and the rest of your fam are all ready to rock the ’90s tie dye trend! The wonderful thing about tie dye is it doesn’t have to be perfect because every project is unique. Use these same steps to tie dye any fabric any color and turn everything into a unique tie dye shape!
