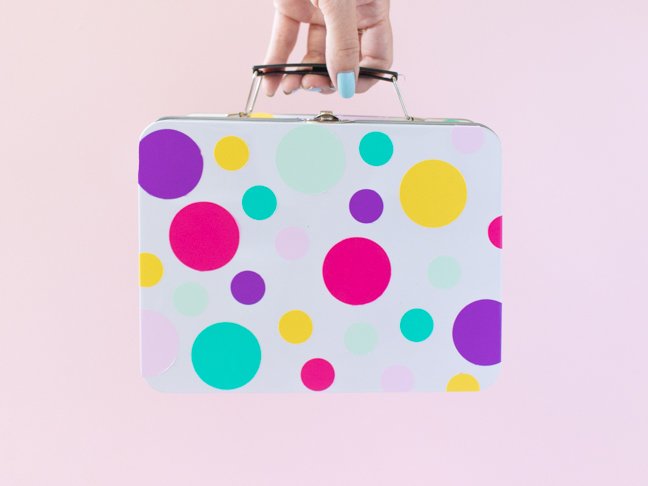
Summer feels like it is still in full swing but back-to-school season is heating up. And while equipping your kids for the first day of school can be stressful, personalizing something like a DIY lunch box can help make things easier. This year, forgo the usual back to school shopping for character lunch boxes or brown bags, and dress up a plain white lunch box instead with bring polka dots or your kiddo’s name. These cute containers can also be used to store pencils, pens and other back-to-school supplies.
Spend your last few days of freedom with your kids and prepare some fun back-to-school snacks and then DIY a lunch box together. In fact, they are so much fun and so affordable to make that you can make more than one and have them switch which ones they use during the week! Get started on your DIY lunch box by following my easy instructions below:
DIY Polka Dot Lunch Box Supplies:
- White metal lunchbox
- Vinyl, variety of colors
- Round punches, 2 sizes
DIY Personalized Lunch Box Supplies
- White metal lunchbox
- Acrylic paint
- Paintbrush
DIY Polka Dot Lunch Box
Step 1: Use various sized punches to punch circles out of several colors of vinyl.
Step 2: Peel away the backing of the vinyl and stick to front, top and sides of the lunchbox, mixing the polkadot sizes until covered.
DIY Personalized Lunch Box
Step 1: Dip a paintbrush in desired paint color and write a cursive name across the front of the lunchbox. Start with a very light coat to outline the word.
Step 2: Go over the name again to thicken the lines. If you make a mistake, simply use a damp paper towel to wipe away the paint while it’s still wet.
Try this! These clever back to school hacks will make this season much easier.
Once dry, your DIY lunch box is ready to use. Pack up a lunch and send your kids off to school with a personalized lunchbox that’s unique to them!