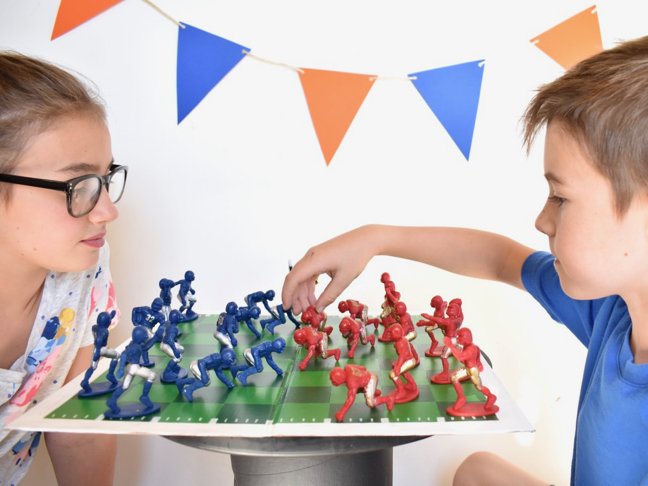
DIY Football Checkers Is a Family-Approved Tailgating Game

It’s football season! In my house, that means cheering on our favorite teams every weekend (on television and on the sidelines for local teams), tailgating games, delicious game day snacks and playing flag football with friends and family. In the spirit of “all things football,” I found a clever way to bring the game of football to a traditional board game, Checkers. It’s a fun, safe and non-tackle version of football that people of all ages can play! This tailgating game appeals to adults and kids of all ages. It may even keep your teens and tweens of of their phones!

The game plan is the same – each player will start with 12 players per side, and the goal is still to capture your opponent’s players by strategically moving the players diagonally forward, and finally “king” each player when they reach the end of your opponent’s board. The only differences are that the board is green “turf” and the pieces are not discs, but rather football players. Each player must still bring their game face, and strong plays to the table. A bonus for this game is that it’s a portable tailgating game, so you can bring it to outdoor tailgate get togethers and parties, or simply conduct a friendly halftime competition at home.

If you or your family loves football, or if you just need something to keep the kids entertained at the next football tailgate or party, try this new DIY football checkers. Game on!

DIY Football Checkers Tailgating Game

Materials:

Instructions:

Step 1: Every football field needs turf, so paint the checkerboard two tones of green. To do this, first, I taped off every other row of boxes and used a sponge brush to paint within the tape. It worked; however my board had a sheen finish, so when I tried to tape off the remaining squares, the paint pulled up with the tape. To successfully finish the board, I hand painted the remaining pieces green. It worked great. Painting is the most time consuming part of this project. Once your done painting, you will coast through the rest of it.

Step 2: Paint the edges white, so your field has sidelines. Next, add yard lines with the Sharpie paint marker. There should be 4 yard lines in each square, and thicker yard markers along the sideline between each square to mark 5 yards. Immediately after, seal the board. This is important so it doesn’t get scratched. Spray, or paint, at least 2-3 layers of sealant.


Step 4: Once the sealant is dry, set your players on their squares, 12 per side, just like a standard game of checkers. Initially I planned to glue players to each checkers piece (included with the game), but since the players stood on their own mini discs, it seemed like more work that it was worth. The players fit great on their squares.

In the game of checkers, players who reach the end of the opponents side become kings. To indicate the players that become a king, I found washers that I spray painted gold, that fit on the player’s heads. The referee holds the washers, and when the players becomes a king, simply place a washer on their head to signify a crown.


Step 5: Ready, set, play!

Like what you see? Don’t forget to Pin it!


TRENDING
No content yet. Check back later!
X
Exit mobile version