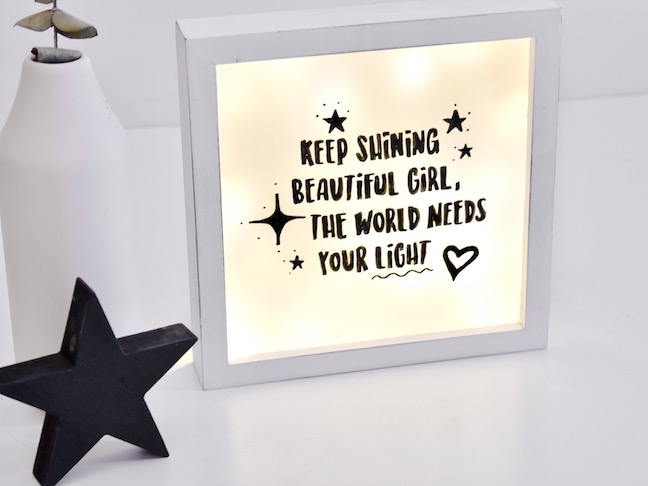
Recycle Christmas Lights to Make This Magical DIY Lightbox

The season of giving, Christmas lights, tinsel, Elf on the Shelf, and Santa may be over, but I want part of that holiday magic year-round. Plus, one of my goals this new year is to recycle more and to try and be eco-friendly. So, I’m not packing up my twinkle lights; instead, I recycled them and made A DIY lightbox for my daughter’s room.

I didn’t need any fancy machines or materials for this project – just a couple sheets of vellum paper, a paint pen, a shadow box, twinkle lights (of course) and a really good quote. I’m motivated by inspirational quotes, especially in January when I set personal goals for myself. Plus, I believe our young girls need to be reminded how special they are every day. That’s why I transformed an ordinary shadow box into an inspirational DIY lightbox. I hope my daughter always shines bright just like her new lightbox.

Now, I need to make one for my room, because it’s so cute! Here’s how you can recycle your Christmas lights and make your own festive lightbox:

Materials:

Directions:

Step 1: If your shadow box has glass, remove the glass. Trace the removed glass on a piece of vellum, and cut it out. I used two pieces of vellum layered on top of each other, but you can use one, two or three. It depends on the “look” you want when the lights are lit, so play with it if you want.

Step 2: Find a inspirational quote online, and design your words in Microsoft Word, or find a free printable online. Print, and then place it under your piece of vellum to trace the design and/or quote. You can use a Sharpie during this step to trace the words. I used a Paint Pen, because the Sharpie didn’t appear as dark when the lights were lit.

Step 3: Now it’s time to add the twinkle lights. If the back of your shadow box is a loud color, you may need to add white or solid colored paper. Mine was a tan burlap print, and it worked fine as is. Begin to line the lights on the back of the shadow box row by row. Use scotch tape the strand of lights in place. Hot glue would work as well on the low setting. Try to place the lights evenly across the backing, so the light effect is equally spread throughout the shadow box when the lights are lit. The end of the light can be taped to the back of the box (so you can’t see it, and it’s easy to turn on and off), so leave about one to two inches of lights that can wrap around the back.

Step 4: Apply hot glue around the inside of the frame (where the glass once was), and then quickly add the vellum with the design facing outward. Layer another piece of vellum behind (on top) of the first one.

Step 5: Add the back with the lights, secure it with the frame brackets, and light it up!


X
Exit mobile version