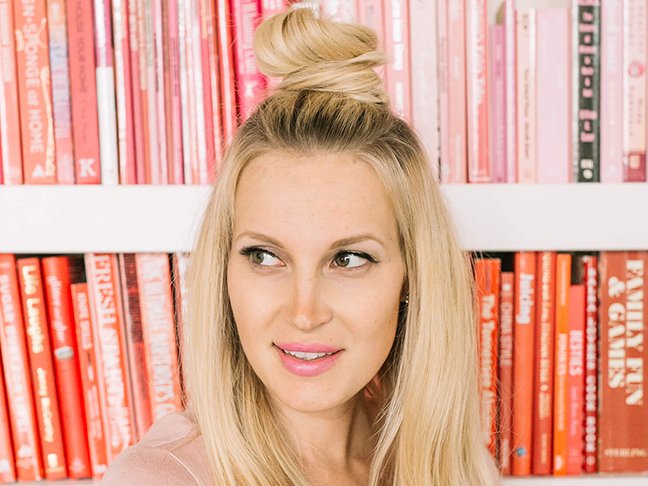
There’s no crazier time than the morning if you have kids. It’s hard enough to find a few minutes to down a cup of coffee (must. have.coffee) let alone finding the time to primp. And if there’s a hairstyle better suited for busy moms than a top knot, I have yet to find it. Easy to create on all hair types and textures, and requiring little more than an elastic and few bobby pins, it’s my go-to ‘do. Best of all, there’s no shortage of ways to change it up for an entirely different look.
Looking for some tricks to speed up your routine—survival-mode-style? Check out these easy-to-follow top knot hair tutorials that even you have time for in the morning.
The 10 Best Top Knot Hair Tutorials
Tousled Top Knot
A tousled top knot only looks better the messier and more undone it becomes - AKA there's no need to stress about perfection. Curl your hair, or, time-saving hack alert, mist a texturizing spray throughout. Try: Not Your Mother's Double Take Dry Texture Spray ($7, Ulta). Pull all of your hair into a high, loose ponytail and split it into two sections. Twist one of the sections, then wrap it around the base and pin in place. Repeat with the second.
Image via Camille Styles
Short Hair Top Knot
Short hair, don't care. For anyone sporting shorter styles (think bobs or lobs ), this is an easy way to get in on the top knot trend. Take a section at the crown of your head and lift it straight up. Mist the underside with dry shampoo to both absorb excess oil and add volume. Our pick: Living Proof Perfect Hair Day Dry Shampoo ($23, Sephora). Use a fine-toothed comb to tease the underside for extra lift. Create a bun with this section by pulling it into a ponytail and leaving the ends sticking out. Finish by teasing the roots on the hair that's down to ensure the finished style doesn't look flat.
Image via One Little Momma
Half-Up Top Knot
Shown here with added curls, this works equally well on straight strands, too. Simply take a three- to four-inch wide section of hair at the crown of your head and secure in a tight pony. Lift it straight up and backcomb the underside for extra fullness, loosely twist, then wrap around the base of the ponytail and pin in place. A quick spritz of a flexible hold hairspray, like Tresemmé Compressed Micro Mist Flexible Hold Hairspray ($5, Walmart), is all you need to keep the style in place.
Image via A Beautiful Mess
Ballerina-Inspired Top Knot
As pretty paired with a jeans and a t-shirt as with a leotard and tutu, this take on the top knot channels sophistication. Create a ponytail, but don't pull your hair all of the way through; you want a loop with some hair left at the bottom. Twist the ends that are sticking out, wrap around the ponytail holder and secure with bobby pins. Bonus: This works best on uncombed hair, so you don't even need a brush.
Image via A Cup of Jo
French Braid Top Knot
For a major wow factor—with minimal effort—this french braid-top knot hybrid can't be beat. Start by sectioning a piece of hair at the top of your head and clipping it out of the way. Flip your head over (this is easiest if you're sitting down) and French braid all of the hair that's left out. Once you reach the section that's clipped up, secure the remaining hair at the end of the braid with an elastic. Flip your head back over, unclip the top section, and combine it with the end of the braid. Pull this into a bun, then pull apart and adjust until the top knot looks the way you want it to.
Image via Twist Me Pretty
Looped Top Knot
This may look like a complicated up-do, but, spoiler alert, it's not. Create a ponytail, pulling only half of the hair through. Pull apart the loop, then fold up the loose tail and tuck it back into the elastic. Take the sides of the loop and tuck those back into the hair tie as well, then pull on it again; it should look like a three-leaf clover. Finally, take a piece from each side of the clover and pull across to the other side, so that they overlap, and secure with bobby pins.
Image via Life On Waller
Classic Top Knot
Consider this the classic version of this versatile style. Start with a ponytail, pulling all of your hair though once, then only half of it the second time, so that half of the tail is sticking out and you have a loop at the base. Flip these loose ends toward the front of your face, then wrap back towards the back of your head and pin. No need to stress about it looking perfect, you want to overall effect to come across as carefree and effortless.
Image via Lauren McBride
Smooth & Sleek Top Knot
Consider this your special occasion top knot, a smooth and polished version that works for even the most formal of situations (but don't worry, still only takes minutes to create). Start with a high ponytail, then lift a small section of the tail up (the tips of your hair should be toward your face) and back-comb the bottom part closest to the hair tie. Flip the section back and spread it out, then pin the underside. Repeat this process, using three other small sections all the way around the ponytail. Mist a hair spray, like OGX Smoothing + Shea Sleek Humidity Blocking Hairspray ($9, Ulta), across the entire style to tamp down any errant frizzies and ensure the end result is extra sleek.
Image via The Small Things
Full Top Knot
Believe it: Even if you have fine, limp locks you can still create the illusions of a full and fluffy top knot. Pull hair into a ponytail using just your fingers (brushing it will smooth it out too much and make it appear flatter). Pull all the hair though the elastic the first time, leave out the tips on the second pass, then flip back them through and tuck underneath the elastic. Once everything is secured, gently tug on either side of the knot to ensure it looks extra full.
Image via Twist Me Pretty
Boho Braid & Top Knot
No time to wash your hair? Been there. Enter this style, which works best on day-old hair. Take a section of hair at the crown of your head and twist into a bun. Pin in place, then pull it apart to make it appear fuller. (If your bobby pins tend to slip out, spray them with dry shampoo before pinning.) Take a section of hair underneath the bun and either fishtail braid it, as seen here, or create a traditional three-strand braid. Secure with a clear elastic, then tug on either side of the braid to give it that undone, boho vibe.
Image via Kassinka