Summer is rough on my hands. I spend my days throwing balls and frisbees, digging in our garden, pushing my 3-year-old higher and higher on the swings, or gripping our double stroller for dear life while I huff and puff up the hills in our neighborhood. By the end of the day, I have more than a few broken nails and every one of them is caked in dirt. So giving my hands a little TLC once a week with a DIY summer manicure helps to give me a fresh start and maintain whatever bits of my sanity I didn’t leave at the playground.
If you’re tired of just slapping on a coat of the same nail polish that has been in your medicine cabinet for the last two years, it may be time to experiment with a fun DIY summer nail design. A few fresh looks that will have the other moms at the pool begging for the name of your manicurist. Make sure you start with clean, shaped nails and I will guide you the rest of the way.
From monochromatic to geometric, go bold with one of these summer nail designs.
Monochromatic Mani
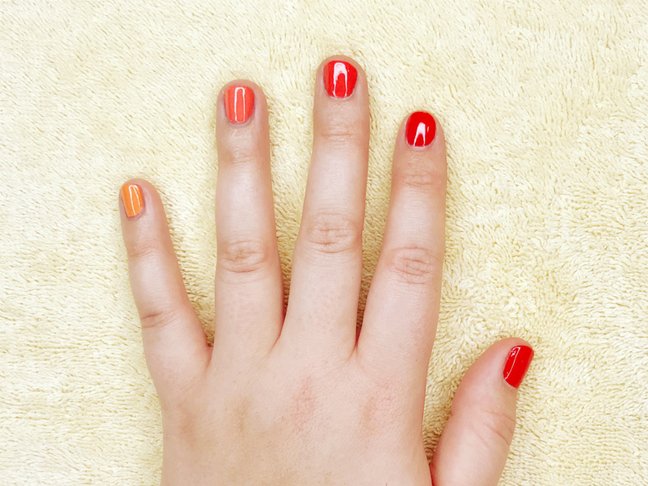
Do you remember painting your nails in middle school and not being able to decide on a color? You wound up using every bottle in your Caboodle and rocked your rainbow nails with pride. This is a grown-up take on that tried-and-true fashion statement. Pick a color, any color, and use five different shades of it. I like using the lightest of the shades on my pinkies and going darker and darker as I move towards my thumbs.

For this look, I worked around a coral bottle of polish that I always reach for in summer. Coral is a great color for a monochromatic look because it gives you a little wiggle room for interpretation. Since it has reds, pinks, and oranges in it, you can use those in your manicure if you don’t have five different bottles of coral polish sitting in a bathroom drawer.
Once you’ve applied your base coat and two coats of each color, finish it off with a glossy top coat and you won’t be able to take your eyes off of them.
What’s Ice Cream Without Sprinkles?
Nail art can be a little intimidating, but it doesn’t have to be. Simple designs can look professional if you take your time and throw some color in there. This look is inspired by one of my favorite summer treats — a towering ice cream cone of vanilla soft serve, covered in rainbow sprinkles. All you need besides white polish is some craft paint and a thin paintbrush or a toothpick. I found everything I needed was already in the art bin my kids use to hold half of my kitchen hostage when they’re home from school.

Start with a base coat and two coats of white nail polish. You want to make sure the polish is white-white, nice and thick with pigment. Once those coats are dry, squeeze out a dot each of your craft paint onto a paper plate. I used four colors– yellow, pink, orange, and green.
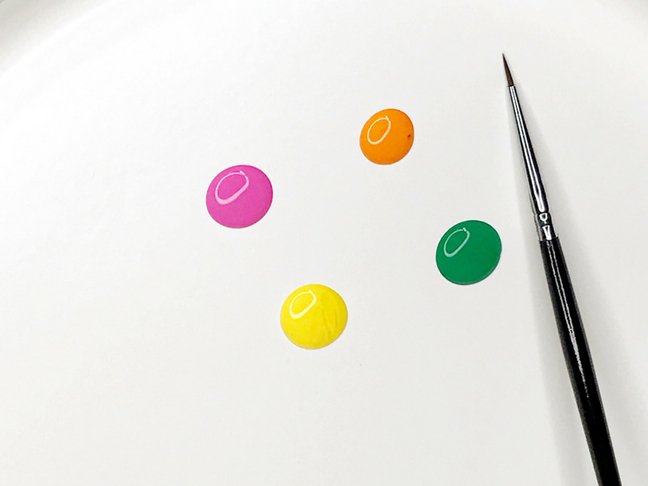
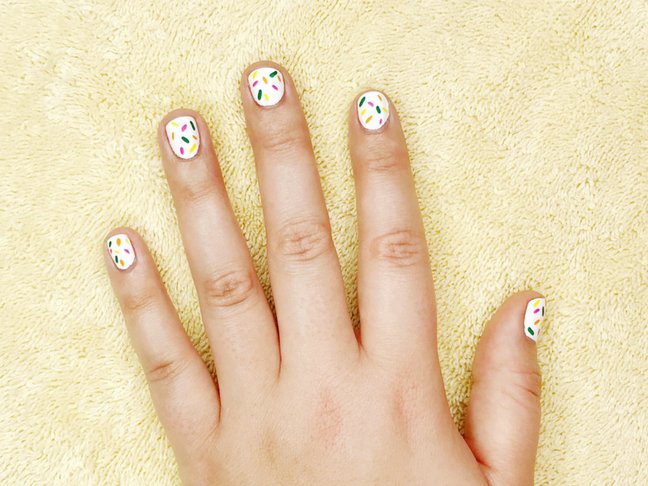
Using a thin paintbrush or a toothpick, draw tiny dashes of each color on your nails so that they look like you just shook a can of sprinkles over them. I draw a couple sprinkles in one color on each nail before moving onto the next color. This way, I’m not constantly cleaning my brush.
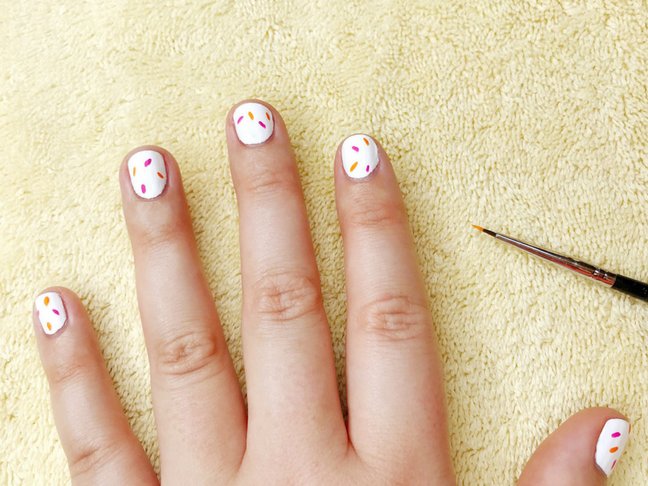
Make sure your design is completely dry before applying your top coat. Otherwise, the craft paint will smear and you risk letting out some four-letter words your child’s teacher will not appreciate them picking up while they are on break. Then use your treat-inspired mani as the perfect excuse to go out for ice cream.
Geometric Digits
Statement nails are a great way to work a little nail art into your mani without having to spend time detailing every single nail. Painting the other nails a solid color also allows you to get a little loud with your design without it looking like too much is going on.
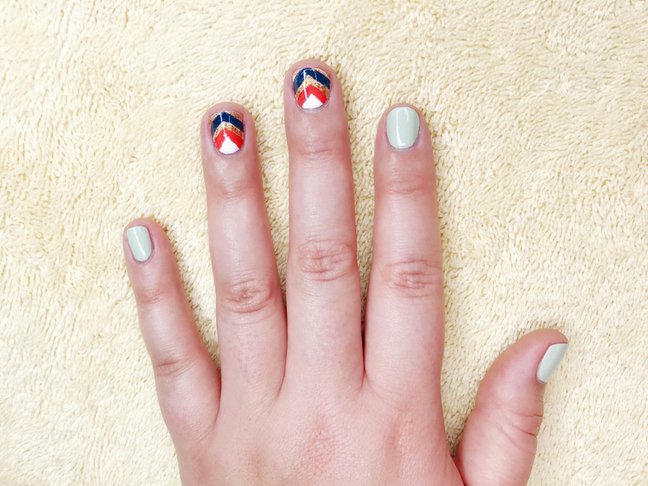
For this look, I used colors that I love to wear in summer but that don’t scream “neon boardwalk t-shirt shack” when I wear them all together. Mint, white, gold, coral (can you tell I love that color this time of year?) and navy was the color palette I decided to go with. The mint, white, and gold are all nail polishes. The coral and navy are craft paint.
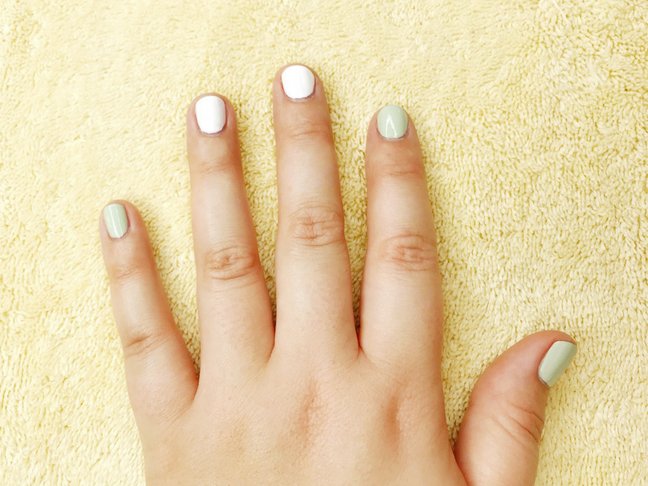
After applying a base coat to all of your nails, paint your pinky, index fingers, and thumbs mint. Paint your ring and middle fingers white so that you have a good base for your design to pop on. White space will also be part of the final design. Use two coats of polish on each nail.
Take a small paintbrush or a toothpick and paint a coral V coming down from the top of your nail on both your ring and middle fingers. Then paint a navy V below, leaving some white space between this and your original coral V. Bring the point of the navy V down to the end of your nail.
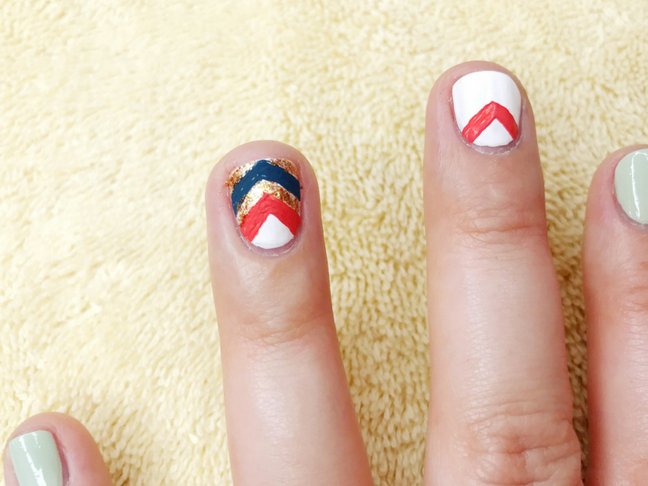
After your coral and navy V-shapes have dried, use a gold glitter polish to fill in the white space between the two Vs and on any white space left at the end of your nails, below your navy V. Leave the white triangle at the top of your nail alone.
Seal everything with a top coat. The flat craft paint will gloss right up once your top coat is applied.
